How To Create Dynamic Water Mark On Images Using ASP.NET
Published on January 31, 2013
In last 5 post we have seen how to manuplate images in asp.net using WebImage Helper. Today we will see one more operation we can do on images using WebImage Helper.

I am assuming you have installed Visual studio Express for web 2012. Now follow the following steps.
1)Open your VS Express For Web(go all programs search for vs express for web).
2)Create a New Web Site Under File Menu.
 3)Add New Content Page(Razor v2) to website and name it as watermark.cshtml.
 4)Right Click on your website and select Manage Nuget Packages.
 5)Search with keyword helper in top right search box, from the result install ASP.NET Web Helper Library
 6)Next step it will ask for Licence Acceptance, You have to click on I agree button.
 7)Add the following Code to watermark.cshtml
@{
Page.Title = "Dynamic watermarking on images";
Layout = "~/_SiteLayout.cshtml";
var imgpath="";

if(IsPost){
WebImage img = WebImage.GetImageFromRequest();
var wmtext=Request.Form["watermark"];
var imgname = Path.GetFileName(img.FileName);
img.AddTextWatermark(wmtext, fontColor: "red");
imgpath = @"Uploads\" + imgname;
img.Save(@"~\" + imgpath);
}

}
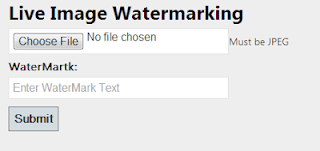
<h1>
Live Image Watermarking</h1>
@if(!IsPost){
<form action="" enctype="multipart/form-data" method="post">
<input name="img" type="file" />Must be JPEG
<label>WaterMartk:</label>
<input id="watermark" name="watermark" placeholder="Enter WaterMark Text" required="required" type="text" />
<br />
<input type="submit" value="Submit" />
</form>
}
@if (imgpath != "")
{
<div class="result">
<div style="float: left; margin-right: 11px;">
<img src="@imgpath" />

</div>
</div>
}
- Screen Shots

 Reference
//asp.net

